Templates
We’re going to work on making the output of our application look a bit better, and accept descriptions for our new randomly generated talk titles. Thinking back to the Building Blocks of the Web workshop, the first step here is to build a page using HTML. One limitation of using plain HTML is that it won’t allow us to embed data from our application code in it easily, but luckily Flask gives us templates that make it easier to do this. Templates allow us to print the values of Python variables in our HTML files, and allow us to run some Python code in them such as loops. This is how our applications can become more dynamic.
Templates also allow us to reuse small snippets of HTML rather than creating full HTML files for each part of our application. For example, if you had the same header on every page, you could write the HTML for the header once, and then include it in other pages. That way you’ll only need to change it one place, rather than on every page of your application. You’ll see some examples of the power of templates as we go through the next parts of the workshop.
Here’s our first template which we will place in templates/new_talk.html:
<h1>Submit a new talk</h1>

<p>To submit a new talk, please create a description below for your randomly mashed up talk title, then press the "Submit" button.</p>

<h2>{{ title }}</h2>

<form action="/talk" method="post">
  <label for="form-title">Title:</label>
  <input type="text" name="form-title" value="{{ title }}" size="100" readonly />
  <br /><br />
  <label for="form-description">Description:</label>
  <textarea name="form-description" rows="10" cols="50"></textarea>
  <br /><br />
  <input type="submit" value="Submit" />
</form>
You may recognize some of these HTML tags from the Building Blocks of the Web workshop. The less recognizable part may be the things enclosed by the <form> tag. Here, we’re defining a form that can be submitted (or “posted”) back to our application (at the route /talk, which we will make after this). This form contains a field for the title of the talk (which is pre-filled), and a description field, which will allow someone to enter their own description. Finally, the form ends with a “Submit” button to submit the data back to our web application.
Create the Template File
- First open the file explorer side panel.
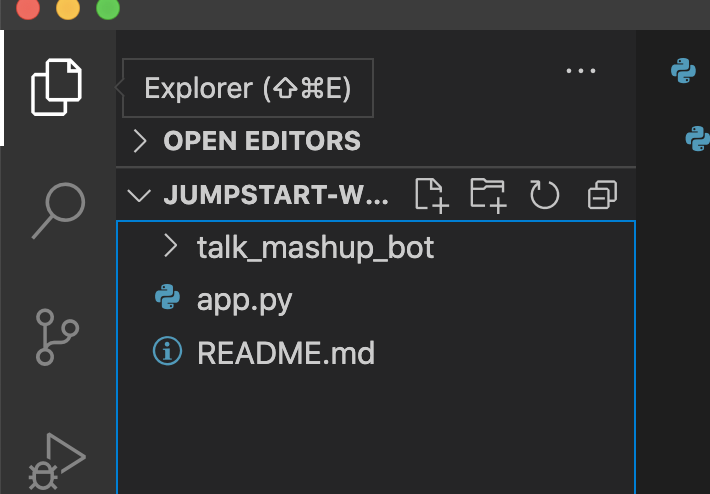
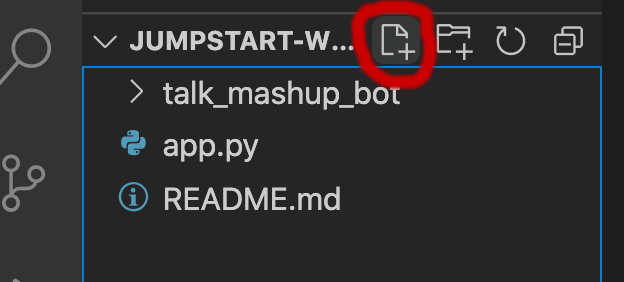
- Hover over “JUMPSTART-WEBDEV” which exposes some buttons. Hover over the new file icon and click it.
Enter both the directory name, a slash, and then the filename new_talk.html. So you’ll enter
templates/new_talk.html: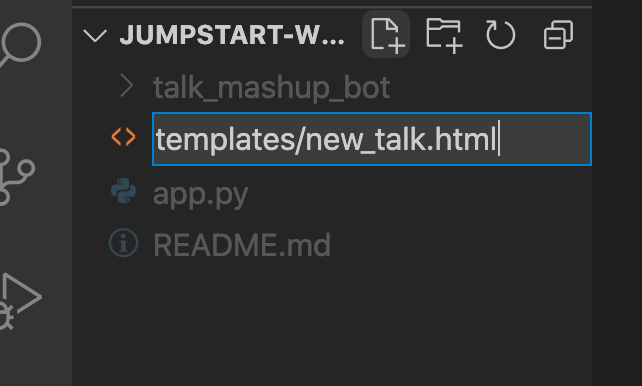
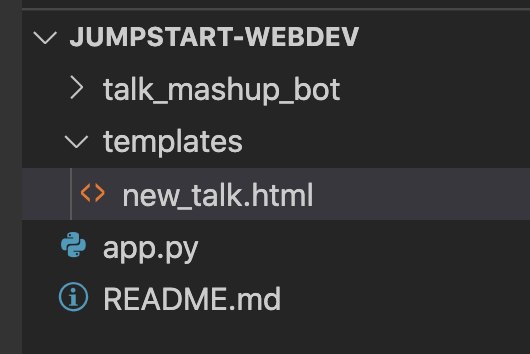
When you hit enter you should see a new file new_talk.html within the templates directory.
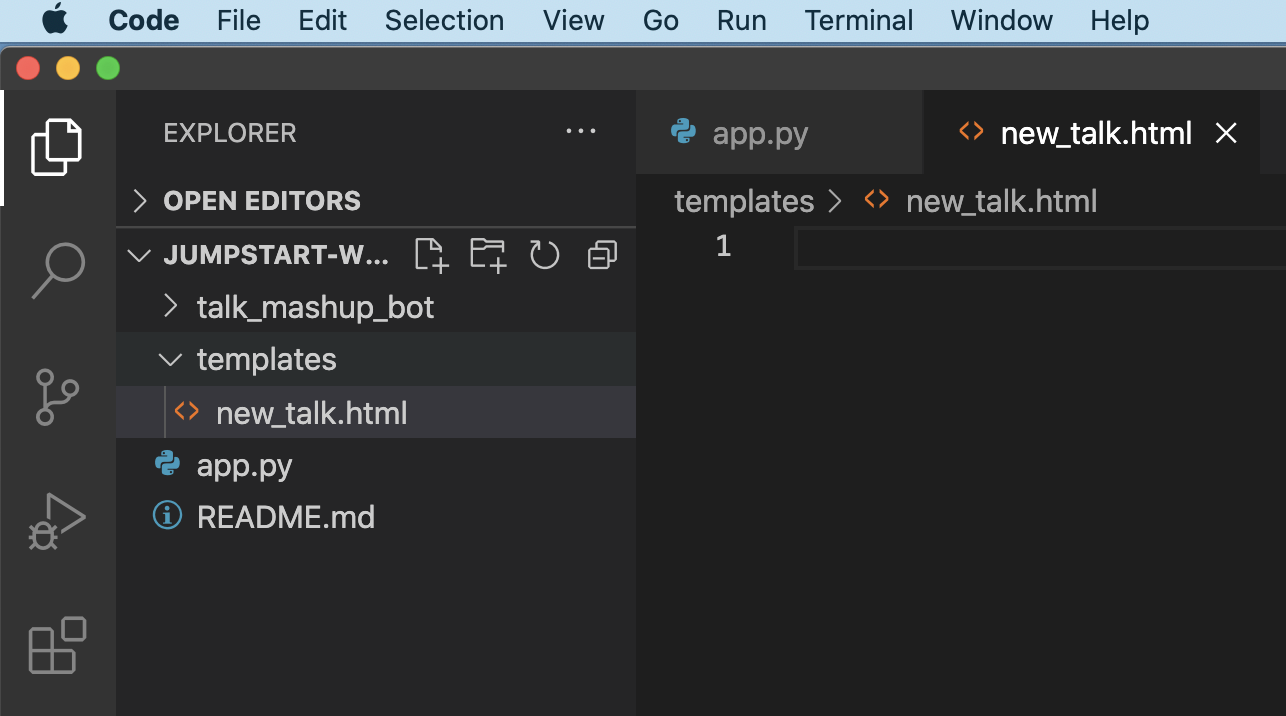
Enter the following code in the editor for new_talk.html and save it.
<h1>Submit a new talk</h1>

<p>To submit a new talk, please create a description below for your randomly mashed up talk title, then press the "Submit" button.</p>

<h2>{{ title }}</h2>

<form action="/talk" method="post">
  <label for="form-title">Title:</label>
  <input type="text" name="form-title" value="{{ title }}" size="100" readonly />
  <br /><br />
  <label for="form-description">Description:</label>
  <textarea name="form-description" rows="10" cols="50"></textarea>
  <br /><br />
  <input type="submit" value="Submit" />
</form>
Using the Template
And instead of just showing the talk as plain text, we will update our /talk/new route in app.py to use this template in our route:
We will replace:
return title
With this code to render our template:
return render_template('new_talk.html', title=title)
If you paste this in, check that you have the leading whitespace correct. Whitespace for indentation matters in Python.
Try it out at: http://localhost:5000/talk/new
What’s Happening?
Note how we pass in the variable title to our template, and give it the value talk_title, which we defined in the line above. If you look at the template again you’ll see that the template includes some markup like {{ title }} which is used to substitute in the value of the variable.
Different frameworks may use a different syntax for how to replace variables in templates.
Here’s what our full Flask application looks like now:
# app.py

from flask import Flask, render_template, redirect, url_for, jsonify, request
from talk_mashup_bot import talk_mashup_bot

app = Flask(__name__)

@app.route('/')
def hello():
    return "Hello world!"

@app.route('/talk/new')
def new_talk():
    talk_title = talk_mashup_bot.generateTitle()
    return render_template('new_talk.html', title=talk_title)

if __name__ == '__main__':
    app.run(debug=True)
And here are all of the files we will have in our file explorer with our new template file:
Let us know in chat that you see your new template in use when you reload the page. Notice that clicking the “Submit” button will result in an error currently. We’ll fix that next!